Written by Mark Pringle | Last Updated on Thursday, November 17, 2022
MVC ASP.NET Version: 6.0 Tutorial Articles
This tutorial will show you how to create an image, photo, or file upload interface using ASP.NET Core 6.0 MVC. The file will be uploaded to a folder that is unique to the user. This tutorial requires that you have a basic knowledge of Microsoft SQL Server and Microsoft SQL Server Management Studio.
IMPORTANT: This project assumes that you have already created a basic ASP.NET Core Web App project with an Authentication Type of Individual Accounts (It takes about 5 minutes. See how to do this). It also assumes that you have installed Microsoft SQL Server, created your database, and updated the applications connection string in the appsettings.json file.
Create the Database Table in Microsoft SQL Server Management Studio
First, using Microsoft SQL Server Management Studio, we will create a simple table to hold the image information. We will not use the Entity Framework Migration feature to build tables in the database. We will make the tables manually to see the relationship between the database table and the database model class. This table will have four columns:
- ImageId - This column will contain the primary key of the uploaded file.
- UserId – This column will contain the id of the user uploading the file.
- ImageAltDescription – This column will contain a brief description of the image. This description will be used to create a unique file name for SEO purposes and can be used as an HTML alt attribute in the browser.
- ImageFileName – This column will contain the photo's name generated using the ImageAltDescription.
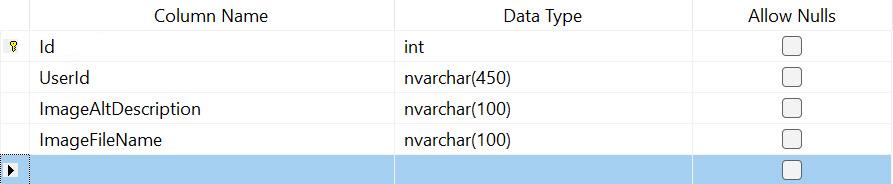
Let’s name the table: Images.
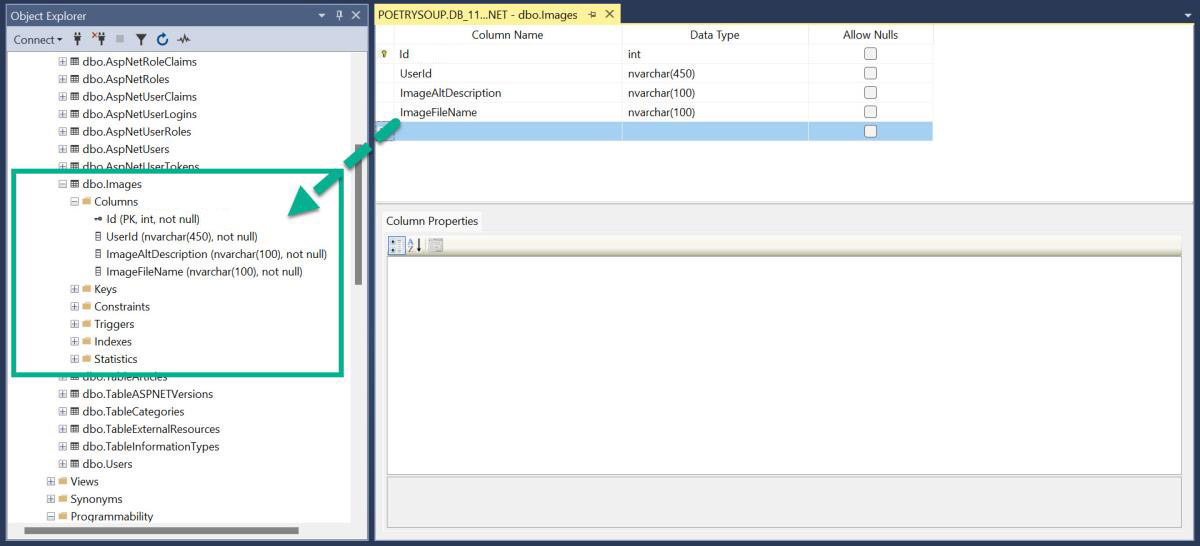
Create a Database Model Class
Let’s go back to Visual Studio and create a database model class to mirror the Images table we just created.
Right-click on the Models folder. Select: Add ~ New Item…
Name the class the same name as the database table: Images.
We will add the four fields (properties) and data types to the Images class. We will then add a 5th property not mapped to a database column. It is used to receive the posted image when it is uploaded.
    public class Images
    {
        public int Id { get; set; }

        [Required]
        public string? UserId { get; set; }

        [Required]
        [DisplayName("Image Alt Description")]
        public string? ImageAltDescription { get; set; }

        [DisplayName("Image File Name")]
        public string? ImageFileName { get; set; }

        [NotMapped]
        [DisplayName("Upload File")]
        public IFormFile? ImageFile { get; set; }
    }
Create an MVC Image Controller with CRUD Actions Using Scaffolding
Now that we have created the Images database model, we can use Scaffolding to create the MVC Images controller with CRUD actions.
To do this, right-click on the Controllers folder and select: Add ~ New Scaffolded Item…
- Select and Add: MVC Controller with views, using Entity Framework
- Select the Model Class you just created: Images
- Select the existing Data context class
- Click: Add

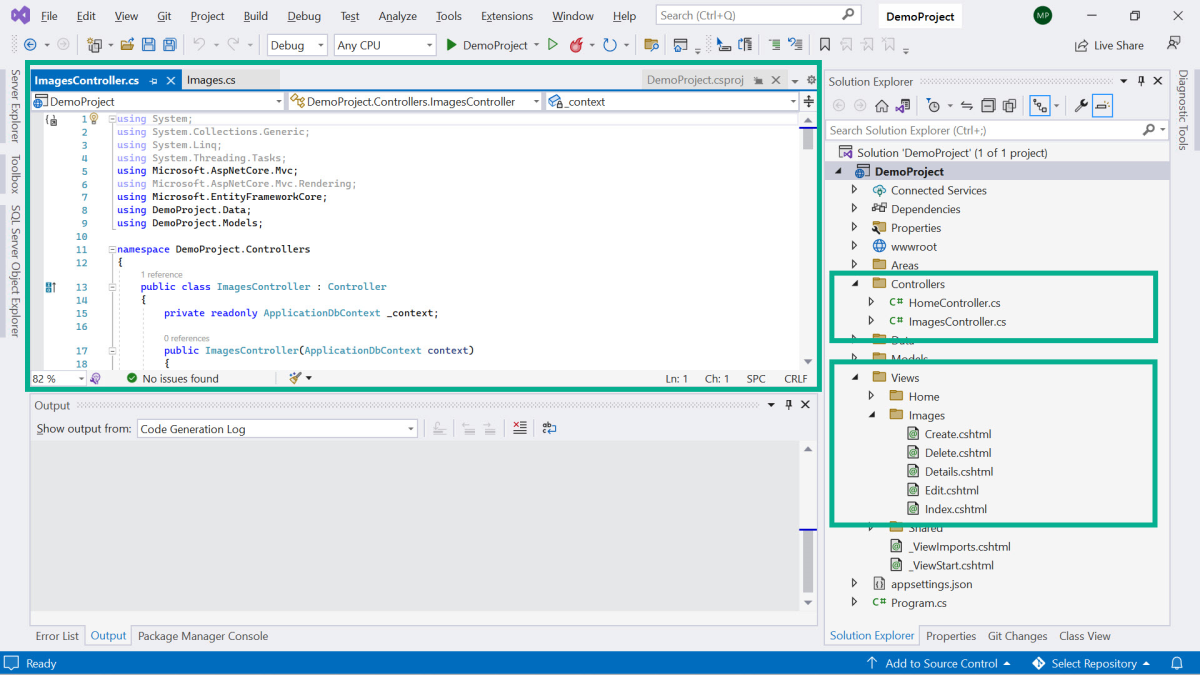
After a few seconds, Scaffolding will have created the ImagesController.cs file and the associated Views. You can see the generated files by expanding both the Controllers and Views folders. The ImagesController.cs file will display in the project window after it has been created.
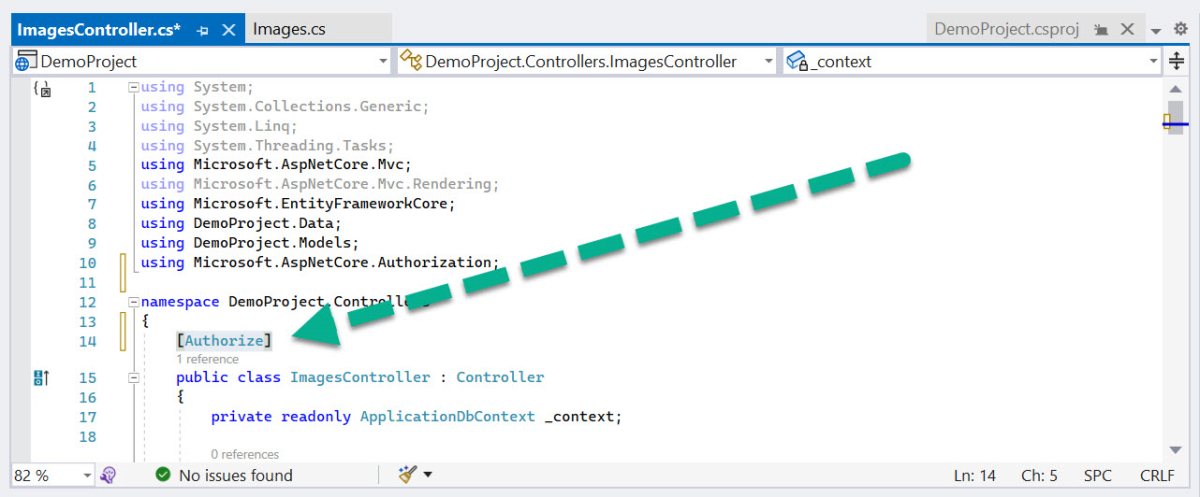
Above the ImagesController class, within the ImagesController.cs file, add the [Authorize] attribute. This will ensure that only users with a registered account can access the upload image page. This is important because we will need to access their UserId and submit it with the rest of the data so that the uploaded images are associated with the current user.
Save your project.
In the Package Manager Console, run the Update-Database command.
Update the Views to User the User Id of the Current User
When we upload an image, we need to send the current user's user ID to the database. For this tutorial, we will add code to the UserId form field to contain the current user’s user ID. This is typically hidden, but we will display it as a readonly form field.
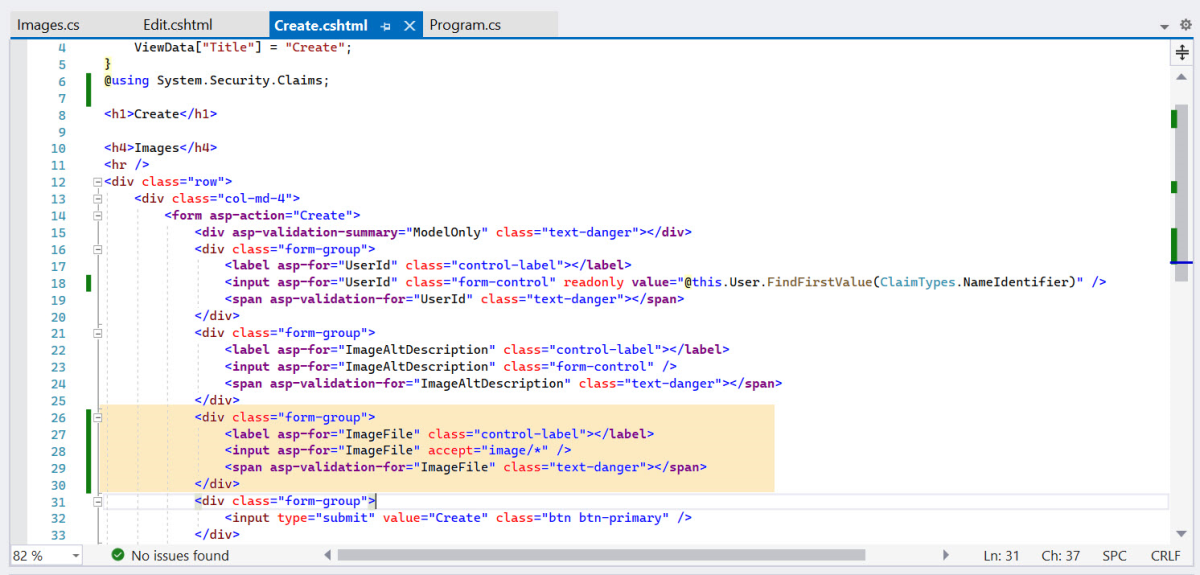
In the Views folder, open the Create.cshtml and Edit.cshtml pages and update the UserId input field code as shown below.
Add the @using System.Security.Claims; namespace as shown.
readonly value="@this.User.FindFirstValue(ClaimTypes.NameIdentifier)"
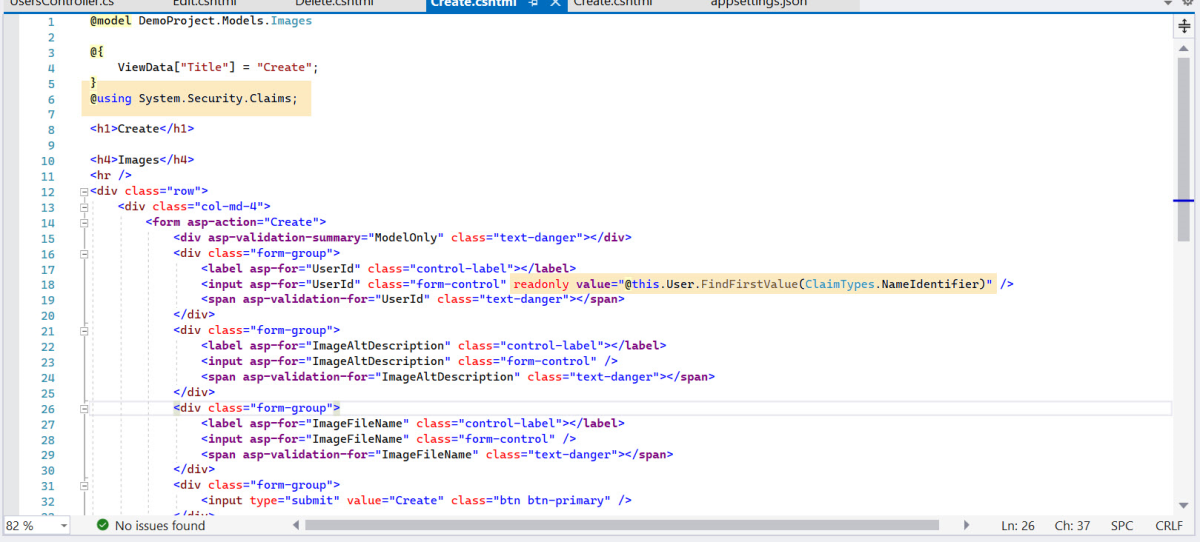
Save both files.
View What We Have Thus Far
You can start your project by running it with or without debugging.
If you have not done so, register for a new account by clicking on the Register link in the header. Enter your registration information and CONFIRM your account using the link on the Registration Confirmation page. Then, log in to the application.
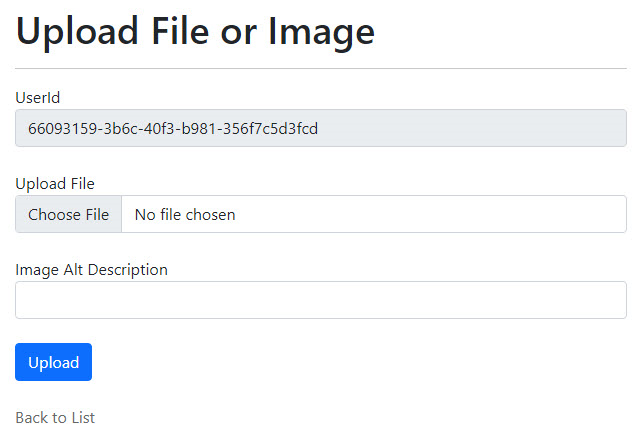
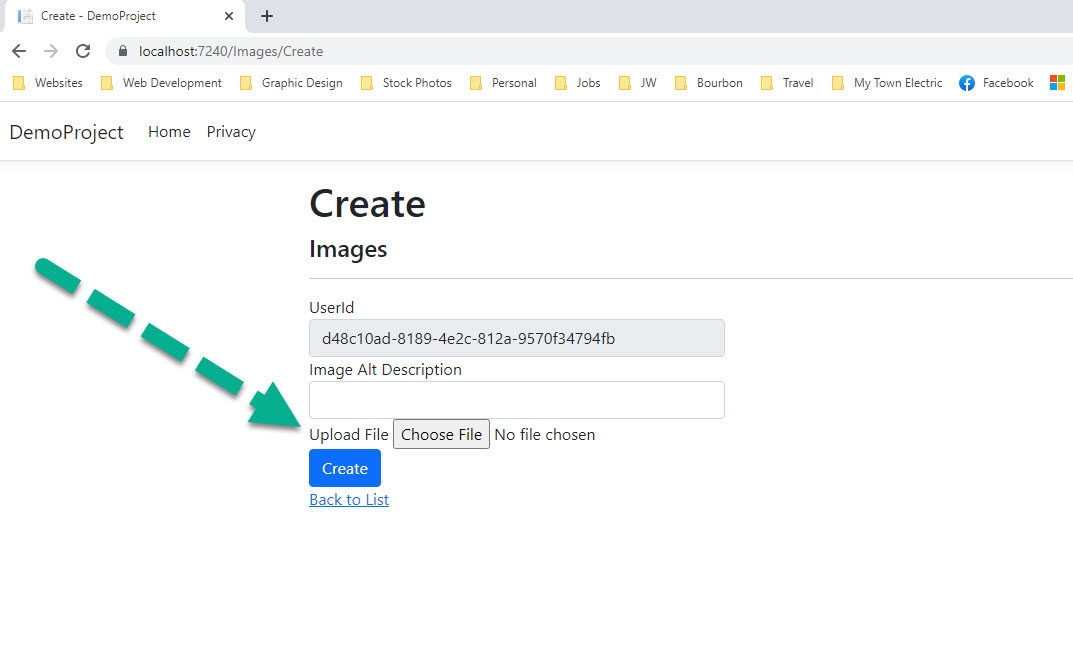
Navigate to the /Images page. Here you will see an empty grid.
Click the Create New link to see the upload form.
You will notice your UserId in the associated field. However, something is missing: the image upload control.
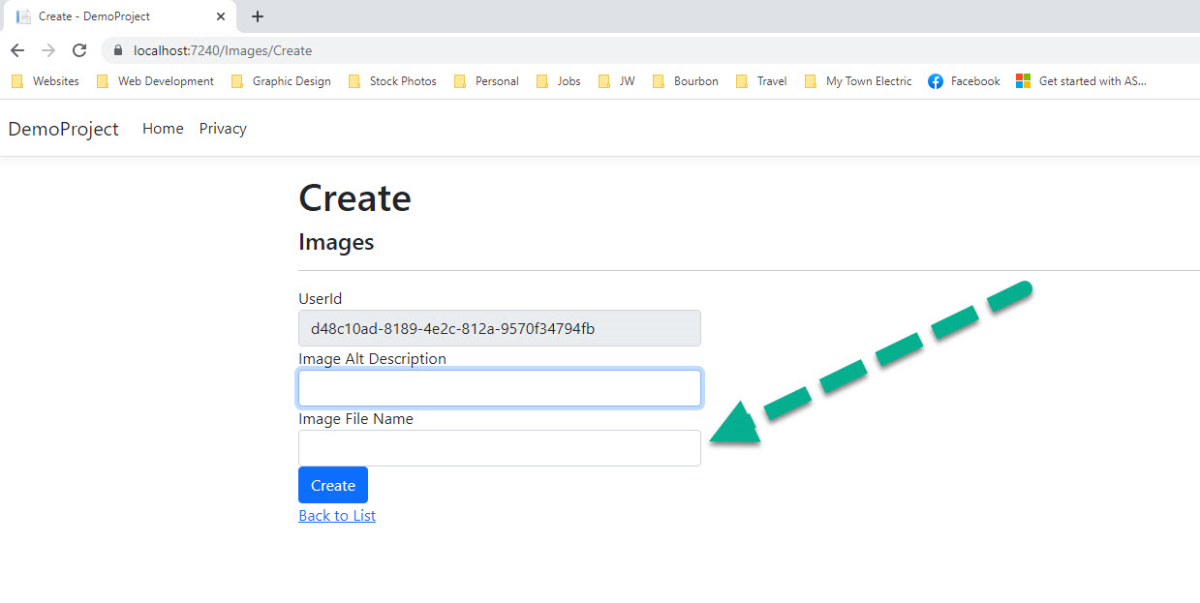
We need to replace the Image File Name input control with an image/file upload control corresponding to the IFormFile ImageFile property in the database model class.
We are not going to worry about making the form pretty. We are just concerned with the functionality of this tutorial.
In the Create.cshtml file, replace the form group containing the ImageFileName with the upload control form group below.
            <div class="form-group">
                <label asp-for="ImageFile" class="control-label"></label>
                <input asp-for="ImageFile" accept="image/*" />
                <span asp-validation-for="ImageFile" class="text-danger"></span>
            </div>
Save the file and navigate back to the Create page. Now, you see the upload control.
Adding the Remaining Functionality to the Image Upload Pages
Now, we must tell the create action how and where to save the image. We do this in the images controller within the create method.
Open the ImagesController.cs file and replace the existing POST create method with the following code.
Read the comments in the code below to see exactly what each part of the C# code is doing.
 [HttpPost]
        [ValidateAntiForgeryToken]
        public async Task<IActionResult> Create(Images images)
        {
            if (ModelState.IsValid)
            {
                //find the root directory of the application
                string wwwRootPath = _hostEnvironment.WebRootPath;

                //get the extension of the uploaded file
                string extension = Path.GetExtension(images.ImageFile.FileName);

                //Create a unique file name using the current date-time and the ImageAltDescription
                string fileName = images.ImageAltDescription.ToLower().Replace(' ', '-');
                string dateTime = DateTime.Now.ToString("yymmssfff");
                fileName = fileName + dateTime + extension;

                //add the new file name to the ImageFileName db field
                images.ImageFileName = fileName;

                ///check to see if this user's directory exists. If not, create it.
                string userPath = wwwRootPath + "/images/" + User.FindFirstValue(ClaimTypes.NameIdentifier) + "/";
                bool isExists = System.IO.Directory.Exists(userPath);
                if (!isExists)
                    System.IO.Directory.CreateDirectory(userPath);

                //ad the full path to the filename
                string path = Path.Combine(userPath, fileName);

                //save the file
                using (var fileStream = new FileStream(path, FileMode.Create))
                {
                    await images.ImageFile.CopyToAsync(fileStream);
                }

                //Insert record into the database
                _context.Add(images);
                await _context.SaveChangesAsync();
                return RedirectToAction(nameof(Index));
            }
            return View(images);
        }
Your upload file application is ready to use.
Upload a file and you will see the uploaded file in the wwwroot directory images folder. It will be in a folder that has your unique id.